![]()
The z-drive belt should be replaced when it shows signs of dry rot (cracking), the sides of the belt gain a glossy look, or the belt breaks. Care needs to be taken to make sure that the z-drive belt is properly tensioned to specified ranges.
Replacement Part Needed:
Belt, Timing, Closed, HTD 5M X 9 X 710 Lg
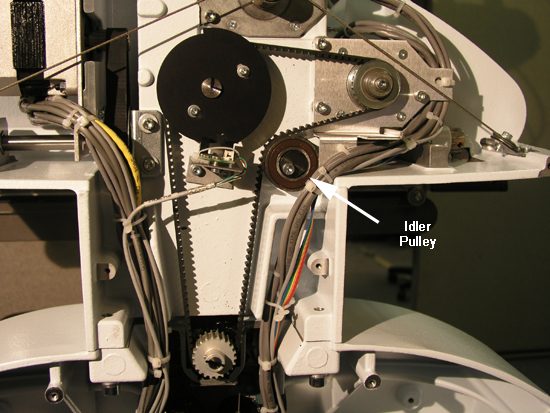
Figure 1 - Z-Motor Drive Belt
1. Remove the left and right upper transparent arm covers.
2. Remove the upper arm back cover.
3. Remove the lower arm rear cover.
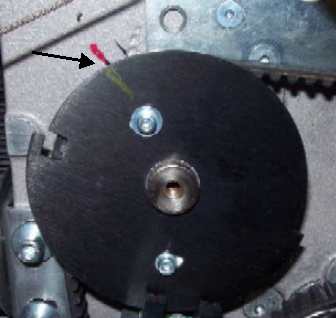
Figure 2 - Z-Home Flag With Index Mark
4. Using a permanent marker, mark a common index mark on both the z-home flag and the upper arm body as shown in Figure 2 above.
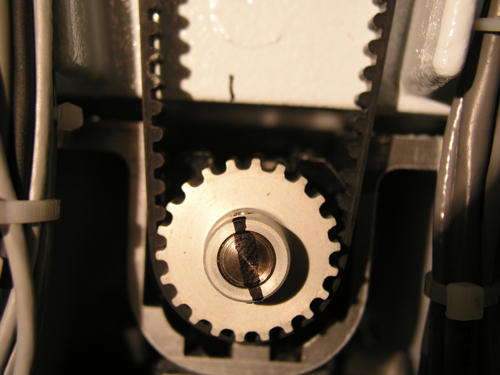
Figure 3 - Lower Z-Shaft Drive Pulley
5. Place an index mark on the lower z-shaft drive pulley and the lower arm body as shown in Figure 3 above.
6. With the machine turned off, slowly loosen the idler pulley screw and rotate the idler pulley counter clockwise to remove the tension on the belt and then remove the belt.
7. Place the new belt on the upper and lower shaft pulleys, keeping both pulleys aligned to their respective index marks as shown in Figures 2 and 3 above.
8. Place the belt on the z-motor drive pulley.
|
|
CAUTION!! The head must be timed at this point. Check head timing using the procedures prescribed in "Head-Up Position Adjustment". |
9. Position the belt over the idler pulley (Figure 1) and slowly rotate the idler pulley clockwise until the belt is tensioned and then tighten the screw on the idler pulley to Melco Torque Specifications. Check and make sure the head is timed using the procedures prescribed in Head-Up Position Alignment.
|
|
Caution: Improper tensioning of belts can cause internal damage to the machine. Tension belts carefully and accurately. |
10. Check and adjust the tension of the z-belt as prescribed in "Z-Drive Belt Tensioning".
11. If you are do not have any more repairs to do to the machine, replace the machine covers in the reverse order they were removed.
![]()