Configuring the Windows environment will require two actions.
The following sections will walk you through both parts and enable the computer and AMAYA to communicate more efficiently.
Because this portion of the setup will require you to restart your computer, you can download these instructions and print them off to have easier access for the configuration of the Windows environment and loading of Melco software.
Adjusting the User Account Controls in Windows 7
Adjusting the User Account Controls in Windows & allows for better communication between DesignShop and AMAYA OS.
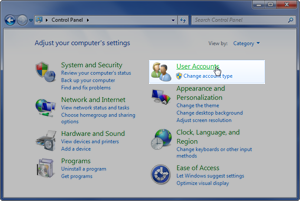
- Click on the and select the .

- Within Control Panel, you may set your view by "Category", "Large Icons" or "Small Icons".
- If in "Category View", click on and in the next window, click on again.
-
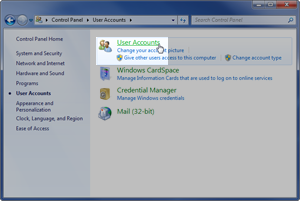
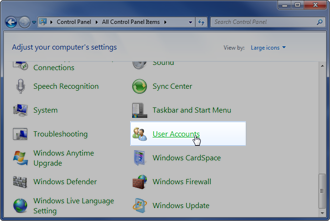
If in either of the icon views, click on . You may have to scroll to find it.
- If in "Category View", click on and in the next window, click on again.
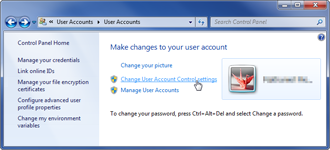
- Click on .
- Move the slider all the way down to "Never Notify", then click .
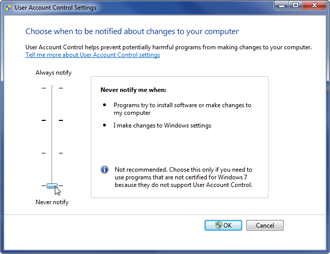
- The User Account Control settings have now been adjusted.
Configuring the Windows 7 Network Environment
- Click on the and select the .
- Within Control Panel, you may set your view by "Category", "Large Icons" or "Small Icons".
-
If in "Category View", click on under "Network and Internet".

-
If in either of the icon views, click on . You may have to scroll to find it.

-
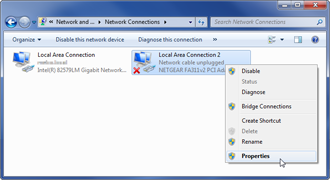
- Click on .

- Right-click on the Ethernet adapter for your AMAYA network and select .
- Click on .
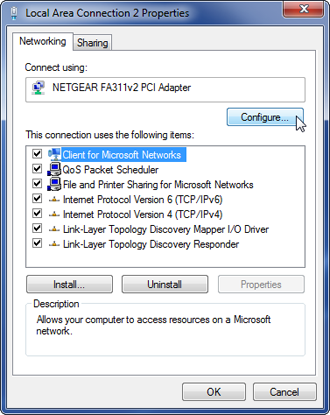
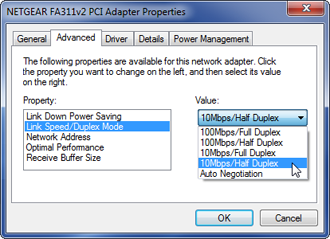
- Click on the .
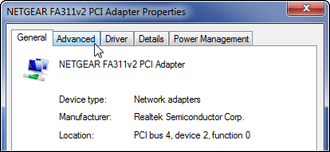
- In the Advanced tab under properties, select the item labeled with "Speed & Duplex" (the exact wording may vary). Under "Value", select 10Mbps/Half Duplex. Here too, the wording may vary from "10mb half duplex" to "10mb Half" or other potential variations, however, all should have a "10" followed by "Mb" or "Mbps" and "Half".
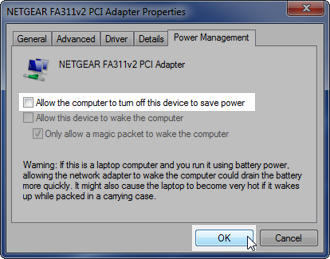
- Click on the Power Management tab, and uncheck the box for "Allow the computer to turn off this device to save power". Then, click .
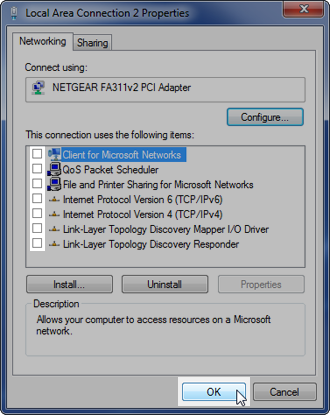
- Once again, right-click on the Ethernet adapter for your AMAYA network and select .
- Under the Networking tab, make sure that all entries in the "This connection uses the following items:" box are unchecked. Then, click .
- The Windows network environment has now been configured for your AMAYA.
