Some designs may contain elements with stitches that are too small to sew reliably well.
DesignShop will begin filtering out every other stitch that falls below five points in length. This will help alleviate the issue, but it may not solve it completely.
Look for the following if your design is having thread breaks on thin outlines or small elements or lettering.
Measurement Units - What's a Point?
Points are a very fine unit of measure found in the embroidery industry and represent a tenth of a millimeter.
For a reference:
- 10 points = 1 millimeter
- 100 points = 1 centimeter
- 254 points = 1 inch
Stitch Size vs. Needle Size
As a general rule, it is best to keep stitch lengths longer than the diameter of the needle you are using to sew them. Because most needles are between 7 and 8 points in diameter, for most applications and designs, try to keep stitches 10 points long or longer.
Ideal minimum stitch lengths would be:
- Walk Stitches ≥ 15 points
- Satin Stitches ≥ 10 points
- Fill Stitches ≥ 20 points
These values may be altered if the application or design dictates, but they are good general minimums.
Thread Breaks On Small Satin Stitches
If thread breaks are occurring on small satin stitches or on small lettering, it could be that your stitches are smaller than the needle that you're using. This can cause some thread breaks. To find this problem areas, use the ruler tool in DesignShop to measure the stitches in the thinnest satin stitch areas. If you find that the stitches are less than ten points or one millimeter wide, you will most likely need to address that area.
Widen the smaller stitch areas to better accommodate the needle and sew with few thread breaks. This can be done a few ways.
- Edit the small areas to widen the stitches.
- Use Pull Offset to widen the stitches.
- Use minimum column width to prevent any satin stitch from falling below the specified amount.
Edit the Smaller Areas Manually
The smaller area of stitches may be edited manually. If the file is an OFM or in wireframe format, you can edit the edges of the wireframe elements to allow for longer stitches.
Use the ruler tool to find the smaller areas of the design. Then, using wireframe edit mode, move the input points to widen the column and lengthen the stitch lines.
Use Pull Offset to Lengthen Stitch Lines
To modify larger areas of designs, it might be more helpful to use pull offset. Pull offset is found in object properties under the "Pull Comp" sub-menu.
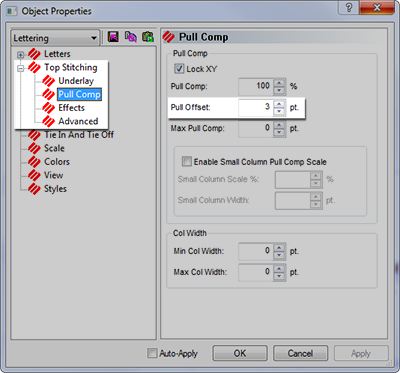
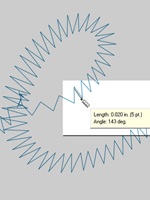
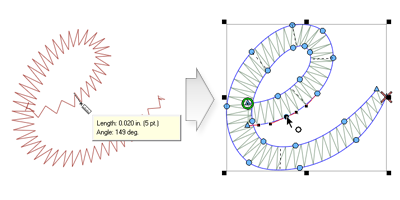
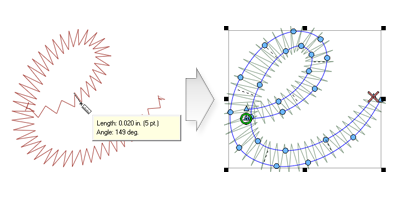
Pull offset extends the stitch lines of an element by adding the specified amount to each side. If the element was 5 points wide at the thinnest point, a "3" could be entered into the pull offset field to extend the stitch lines by three points on each end. This would create an element that at the thinnest point is now 11 points wide and thick enough to sew without breaking a thread.
Because pull offset extends each end of the stitch line, adding 3 to each side of a 5 point satin stitch will give you an 11 point satin.
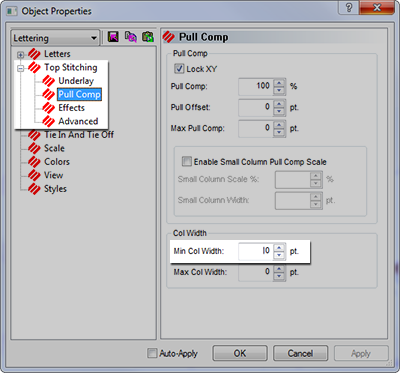
Use Minimum Column Width to Prevent Thread Breaks
Another way to prevent tiny satin stitches from giving you thread breaks is to use the "Minimum Column Width". This feature will prevent any multi-stitch line element (columns or fills) from creating a stitch less than the specified amount.
Found in object properties under "Pull Comp", placing a "10" in the "Min. Col. Width" field can help prevent thread breaks on more questionable designs.
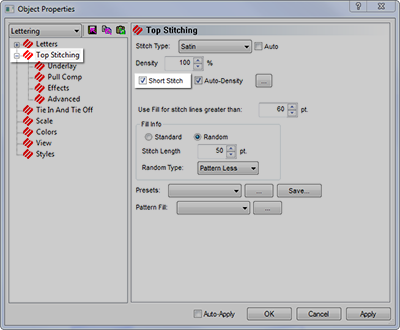
"Short Stitches"
"Short Stitches" is a feature that alternates the length of stitches on the inside of curves and sharper angles. It is meant to prevent thread breaks, thread build up, and damage to garments in those tighter areas.

Newer versions of DesignShop have this feature on by default.
While this feature is beneficial most of the time, it can cause stitches that are too small in smaller lettering or narrow satin stitches. For that reason, since DesignShop V9, a new parameter has been added to the short stitch properties. It will automatically disable for stitch lines shorter than a specified amount. This is set to 20 points by default and should work well for most designs. These parameters can be found under the "Advanced" sub-menu.
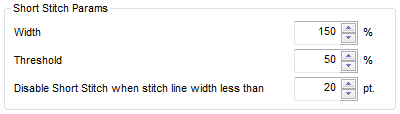
With designs saved in older versions of software, these parameters may need to be checked.
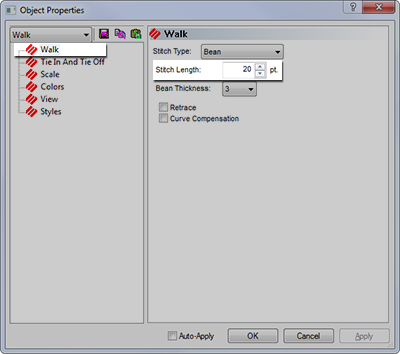
Thread Breaks on Walk Stitches
If walk stitches are the problem area of a design, it could be that the stitch length is just set too short. Try to avoid a stitch length of less than 15 points.
Use Fewer Input Points
Probably the most common cause of thread breaks on walk stitch elements from digitizing is using too many input points in a small area. Every input point that is created also creates a needle penetration.
Many new digitizers try to use more input points to help a walk input element follow a line in the artwork. Try to use fewer points to create the same shape. It will decrease the stitch count, allow the design to be more easily edited, and help prevent stitches that are shorter than the diameter of the needle.
Also try to keep at least 10 points (1 mm) between the input points.