Thread trimmings and lint buildup can cause thread breaks and misstrims. Cleaning beneath and ensuring that the needle plate is centered can prevent these frustrations.
Cleaning Under the Needle Plate
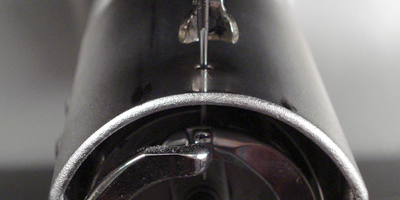
- Remove the bobbin case.
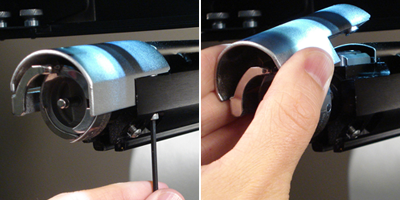
- Remove the rotary hook guard by loosening the two button head screws securing it and sliding it away from the machine.
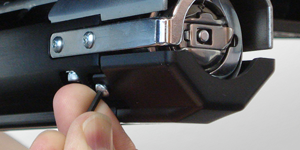
- Remove the needle plate by removing the two allen screws that secure it.
- Using compressed air of a brush, remove any thread or lint buildup from the area.
- Reinstall the rotary hook guard.
- Reinstall the needle plate.
Center the Needle Plate
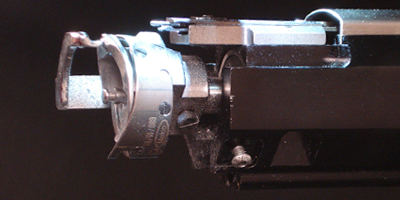
- Center the needle plate as best you can by feel and by eye.
- Lower the needle to its bottom most rotation.
- This can be done manually by pressing the e-stop and rotating the z-shaft to control the decent of the needle,
- OR by going to > > and the tab. Then clicking on .
This will bring the needle down very quickly.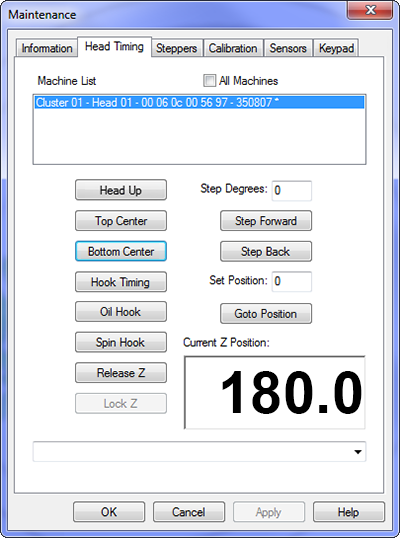
- With the needle lowered, loosen the screws securing the needle plate, and center the hole in the needle plate around the needle.
- Tighten the screws securing the needle plate.
- Depending on the method used to lower the needle, raise it back up by releasing the E-stop or clicking on and .