In order to fully exploit the white-ink printing capabilities of the MelcoJet, it is necessary to implement a layering mechanism. This mechanism allows white ink to be printed from every-day applications like Photoshop and Corel Draw with minimal work and learning curve. There is no need to learn complicated external programs to separate channels and what not.
White ink printing has many nuances. It would be impossible to document all possible artwork scenarios. We can show you how the features work and let your imagination handle the rest.
There is more to the white printing process when it comes to materials. There is pre-treatment of the fabric as well as curing after printing. These topics are beyond the scope of this manual which is intended to help the user understand and use MelcoRIP.
These layer types will be explained below. Hide
This is the layer you will choose when you are printing just CMYK ink (i.e. no white ink). No white ink is used and no processing or examination of the data takes place, other than the usual color management and printer-specific formatting. This means that it will place 100% of a color pixel down on the shirt.
You will use the Color Layer option in conjunction with other White Ink layer printing options as well – White Ink Mask (Soft), White Ink Mask (Hard), White Highlight Layer. The Color Layer option is the key that will allow these white ink layers to begin printing. Until a Color Layer is sent, the white ink layers will just sit in the Output Queue waiting to be printed.
 |
 |
 |
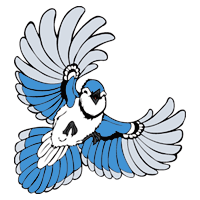
Original Artwork |
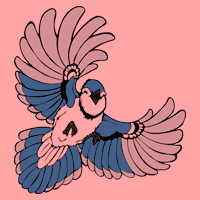
Printed on pink |
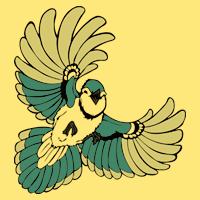
Printed on yellow |
This is the easiest way to do white ink when you are printing vector graphics (i.e. graphics with solid edges all the way around the design). The RIP examines the color layer and automatically creates a white underbase. Any pixel it finds, regardless of pixel intensity, will generate a corresponding white pixel at 100%. This enables the printing of white areas in the artwork without having to manually create the white areas by simply add a 1% Cyan tint to the area and it will become white (the 1% Cyan will not render enough ink to be visible). It is explained in greater detail at the bottom of this post.
NOTE: There are a couple of things to watch for with this approach, particularly when doing photostyle graphics. First, keep in mind that if there is absolutely no color in an area, you will get no white ink. This might cause the shirt color to poke through in pure white areas of the image. To solve this, simply add a tiny bit of color to the white areas. 2% yellow, for instance, will not be visible on the final print but it will cause white mask to be placed under that area, effectively creating a solid white area. The second thing to watch for is very “soft” edges. A very light tint on the outside of the image might cause a white halo. Some trimming of the edges might be necessary on some images.
The best recommendation for printing items with soft edges is to manual create the white underbase (create a new grayscale layer of the graphic) and print it using White Ink Mask (Soft) layer.
When a page is printed with this layer type, all pixels (of any color) are printed in white ink. This is different than a mask layer as it is normally not used for underbase but rather for printing white logos, text, etc in white ink only. Like a white “mask” layer, a white “Ink” layer does not retains the gray-scale. Unlike a white mask layer, a white ink layer will print immediately; it will not be “cached” like a user-defined white mask.
This type will add the pixels to the white underbase. It is used for adding to the automatically generated white mask or for creating your own underbase mask. It is normally used in conjunction with Color Layer. It cannot be used by itself. This version of the “White Mask Layer” makes all pixels 100%, so a light tint would generate a 100% white area.
When you print a white mask layer you are specifying what areas you want masked out in white ink. In the case of White Mask Layer (Hard), any pixel of any color will cause a 100% white pixel. In the case of White Mask Layer (Soft) the resulting white pixel will be the same value as the color, thus enabling blends and fades. The difference between these type of layers and a Color Layer Auto Mask is that the actual color data sent in this mode will never print in color. It will ONLY be used to generate mask data. This is one way to generate extra white where needed in a job. White layers are combined before they ever print (see example below). Please keep in mind that because you can have multiple mask layers, the white will not print until a color layer is received. For this same reason, “White Mask” layers must be sent first.
This type will add the pixels to the white underbase similar to the White Mask Layer (Hard), but the Soft version respects a pixel’s “gray value” so it will support fades, etc. It is used for adding to the automatically generated white mask or for creating your own underbase mask. It is normally used in conjunction Color Layer. It cannot be used by itself.
When you print a white mask layer you are specifying what areas you want masked out in white ink. In the case of White Mask Layer (Hard), any pixel of any color will cause a 100% white pixel. In the case of White Mask Layer (Soft) the resulting white pixel will be the same value as the color, thus enabling blends and fades. The difference between these type of layers and a Color Layer Auto Mask is that the actual color data sent in this mode will never print in color. It will ONLY be used to generate mask data. This is one way to generate extra white where needed in a job. White layers are combined before they ever print (see example below). Please keep in mind that because you can have multiple mask layers, the white will not print until a color layer is received. For this same reason, “White Mask” layers must be sent first.
This layer type is one of the easiest to use when using white ink. It is to be used when the artwork has a black background. The RIP will create white for any white areas inside the black background as well as an underbase of the proper density for the color. This layer type will not use black ink so when used by itself it can only be used on black cotton. To use this layer type and use black ink, use in conjunction with the “Capture Black” layer type, described below.
When you print with this layer type, MelcoRIP will automatically place the appropriate amount of white in the proper areas, using the black background to differentiate “real white” versus “no color”. The main difference between this layer type and “Color Layer Auto-Mask” is that this layer type respects the gray value of the pixel and thus the white does not necessarily need to be 100%. This layer type should be used instead of Color Layer Auto-Mask on artwork which “fades” into the background. Because of the way it works, this layer type when used by itself, cannot use black ink (or the black background would print also). If using black ink is desired, use in conjunction with “Capture Black” layer type.
There are three ways that a user can print white highlights during the color pass: White Mask Only, White Highlight Threshold and Manual White Highlight layer. It will support any color (and turn it into white) but for best results, the image should be grayscale. This layer type allows you to specify verbatim, the image which will print in white ink during the color pass. This is independent of any white underbase layers.
As with the white base mechanisms, the white highlight has automatic and manual modes. The White Mask Only automatic mode will print a white ink highlight only where a 100% white ink pixel is visible on the color layer. Additionally, the user can also set a “threshold” and any part of the image that contains from 1% to the threshold percent will receive white ink during the color pass. Finally, if you have the white highlight as a separate layer – you can send that layer independent of any white underbase layer.
This layer type causes the RIP to capture the black channel (either pure-black or composite) and store it. The saved black layer will then be superimposed on the next color layer printed. This feature was designed to be used in conjunction with “Color Layer Auto-Mask (Black Bkgnd)” so that black ink can be used. To do this, first print the artwork without the black background using “Capture Black” as the layer type, then print the artwork with the black background using “Color Layer Auto-Mask (Black Bkgnd)” as the layer type. That will allow you to use black ink in conjunction with “Color Layer Auto-Mask (Black Bkgnd)” and thus on most any color dark cotton.
Because of the white-generation logic, the “Color Layer Auto-Mask (Black Bkgnd)” layer type does not use black ink. It uses the black cotton as the black colorant. This limits it’s use to black cotton only. In order to use it on other colors of dark cotton, first print the artwork without the black background using “Capture Black” as the layer type, then print using “Color Layer Auto Mask (black bkgnd)” normally.