| Printing Method | Direct to Garment Inkjet Printing |
| Nozzle Configuration | 180 nozzles x 8 |
| Printing dimensions | Max 16.5" x 23.6" (420mm x 500mm) |
Standard platen |
13" x 20" (33cm x 50cm) |
| Dimensions | 33.5" x 51.2"x17.7" (W x L x H) (850mm x1300mm x 450mm) |
| Weight | 176lb (80Kg) |
| Printing direction | Bidirectional or unidirectional |
| Head height | Max 2.0" (50mm) / Auto height adjustment |
| Printable textiles | Cotton |
| Connectivity | USB 2.0, Firewire, Ethernet |
| Printing Resolution W/MelcoRIP | 1440 x 1440 dpi;1440 x 720 dpi; 720 x 720 dpi; |
| Inks | Water based Textile Pigment (for light colored shirtsP100, for dark and light colored shirts PD200) Disperse / Acid / Reactive |
| Colors | CMYK + 4 White |
| Ink Supply | Sealed Ink Cartridges / Resetable Cartridges |
| Cleaning fluid | Refillable and Resetable cartridges |
| Power | AC 110-240V 50-60Hz, 1.0 A /110-120V |
| Temperature (printer) | 50°F - 86°F (10°C - 30°C) |
Temperature (ink) |
50°F - 86°F (10°C - 30° C) |
| Humidity Operation | 45 to 80% RH, non-condensing |
| Humidity Storage | 20 to 85% RH, non-condensing |
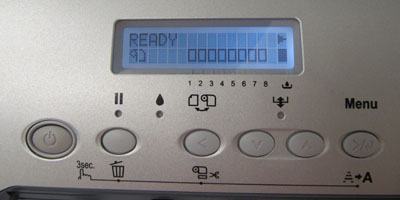
Button |
Function |
 |
|
"On" when Printer is powered on |
||
 |
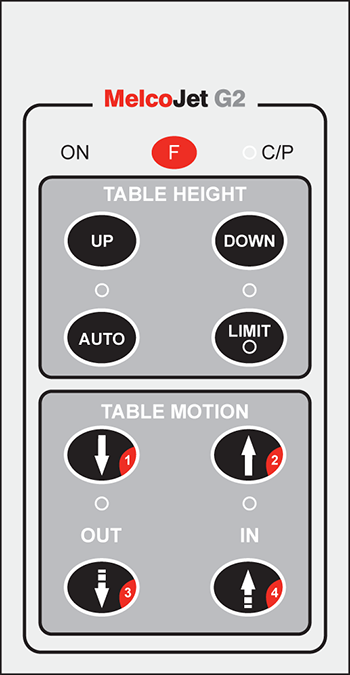
When pressed prior to keys 1,2,3 and 4 will execute various functions (The function key does not need to be held down along with a numbered key... the "F" key is pressed sequentially) |
|
 |
Continuos Print Status light indicator. When "on/blinking" the printer is in continuos print mode. When "off" printer is in normal mode (normal mode is the default) |
|
 |
Moves the table/platen up |
|
 |
Moves the table/platen down |
|
 |
Table Height Auto Used for auto setting table height |
|
 |
Status indicator, when lit the obstruction sensors for table height are blocked. When off, indicates there is no obstruction. If the status indicator is lit, there is risk of striking the print head so table in and out movement may be interrupted until the status is cleared. |
|
 |
Table Motion Button 1 (Key 1) - Moves the table one step out from current position Table Motion Button 1 + F key - (F1) - Puts printer into "Continuos Print" Mode |
|
 |
Table Motion Button 2 (Key 2) - Moves the table one step in from current position |
|
 |
Table Motion Button 3 (Key 3) - Moves the table to the full "out"/"load" position |
|
 |
Table Motion Button 4 (Key 4) - Move the table to the full "in"/"print ready" position Table Motion Button 4 + F key - (F4) - Puts printer into "Non Continuos Print"/Normal Mode (this is the default mode) |
 |
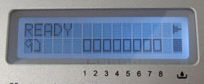
Completes the initialization process during power up.
ONLY PRESSED WHEN THE LCD ON THE PRINTER READS "READY" Required for older printers only. |