![]()
|
|
WARNING!! This procedure is intended to be performed only by specially trained and authorized Melco service technicians and personnel. Disassembly by untrained individuals will void any warranty protection and can result in personal injury or damage to the machine.
|
|
|
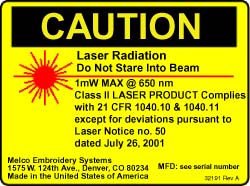
WARNING!! DO NOT allow the laser beam to be aimed at yours or anyone else's eyes. The laser emits a very concentrated light beam that can cause permanent blindness. Use extreme care in handling the laser assembly to make sure it is not going to be inadvertently aimed at someone's eyes or face. DO NOT LOOK DIRECTLY AT THE LASER LENS WHILE IT IS ENERGIZED! |
Before performing this procedure, ensure that:
the work area has been cleared of unauthorized personnel to prevent inadvertent exposure to the laser light.
the laser light is pointed away from any person in the area.
everyone is cautioned to stay out of the path of the laser light.
Remove the laser assembly from the machine using the procedures provided in Laser Pointer Assembly.
TURN THE MACHINE OFF.
|
|
CAUTION!! DO NOT allow the laser housing to touch any part of the machine. If that should happen, the laser will be damaged and will have to be replaced. |
Secure the laser housing on a work surface using nonconductive clamps or devices (just secure enough to hold the laser in position).
|
|
WARNING!! DO NOT LOOK DIRECTLY AT THE LASER LIGHT WHILE IT IS ENERGIZED!! Doing so will cause temporary blindness and can permanently damage your eyes. Exposure to laser light sources will very quickly damage eyes. |
Connect the laser harness to the machine (if not already connected) and turn the machine ON.
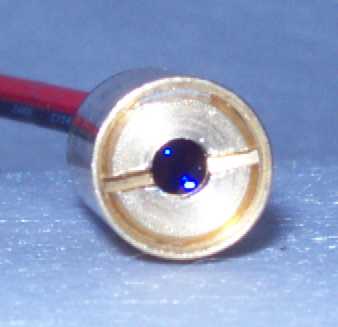
Figure 1 - Laser Lens
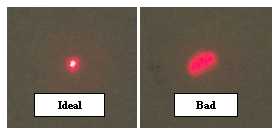
Figure 2 - Laser Light Focus
Adjust the focus of the laser light by aiming it at a wall or a similar flat surface about from a distance of about 10 feet and using a screw driver to adjust the size of the reflected light on the wall. DO NOT look directly at the laser light source while it is energized!!
a. To tighten the focus of the laser beam, turn the lens clockwise.
b. To loosen the focus of the laser beam (make the dot bigger, less concentrated), turn the lens counter-clockwise.
|
|
CAUTION!! DO NOT over tighten or loosen the laser lens too far or you will damage the internal components. |
When the laser is adjusted properly, turn the machine OFF.
|
|
WARNING!! DO NOT proceed past this step until the machine is turned OFF!!! Failure to turn the machine off may result in personal injury or damage to the machine. |
Install the laser assembly using the procedures provided in Laser Pointer Assembly.
![]()