![]()
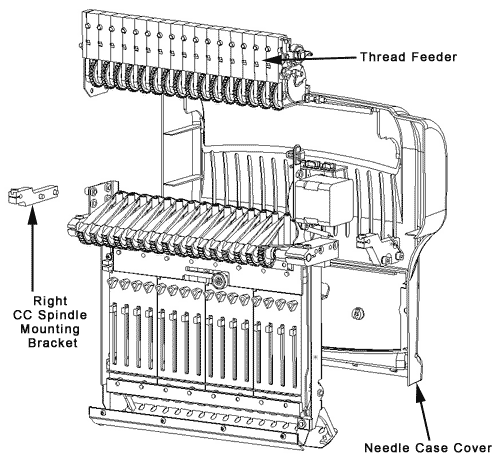
Figure 1 - Needle Case Assembly
Replacement Parts Needed: (for part numbers and description, click on the links)
Thread Feeder Assembly, 16 Needle (comes with hardware installed)
1. Turn the machine off.
2. Remove the needle case access cover.
3. Remove the needle case cover.
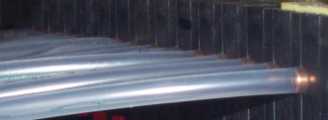
Figure 2 - Thread Tubes Connected to Thread Feeder Assembly
4. Remove the thread tubes from the back of the thread feeder.
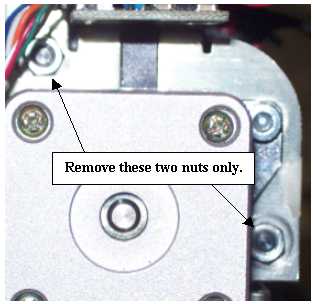
Figure 3 - Thread Feeder Assembly, Left Bracket
5. Loosen the two nuts on the left side at the end of the long bolts as shown in Figure 3 above.
.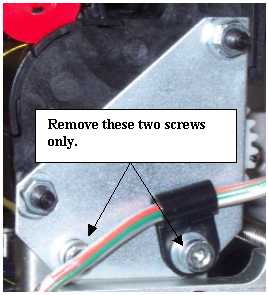
Figure 4 - Thread Feeder Assembly, Right Thread
6. Remove the two socket head screws on the right side as shown in Figure 4 above.
7. Remove the pack with the 16 feeders to the right side as one unit. Do not disassemble the assembly any further.
|
|
IMPORTANT! Do not disassemble the 16 needle thread feeder assembly. Disassembly and reassembly of this component requires specific skills and alignments that are best done at the factory. |
8. Slide the replacement thread feeder assembly onto the needle case.
9. Replace and tighten the two bolts on the right side as shown in Figure 4 above. Tighten the bolts only enough to secure the bracket to the needle case.
10. Install the nuts on the left bracket and tighten them just enough to hold the left bracket in place.
11. Color change to needle number 1.
12. Adjust the thread feeder assembly so that the bearing on the color change housing is pushing the red thread feeder clicker for needle 1 in about 50% from the fully extended position. Tighten the screws on the right side.
13. Click on "Maintenance" from the AMAYA OS (AMAYA OS) main menu to open up the "Maintenance" menu.
14. Click on the "Stepper" tab to open up the "Steppers" submenu.
15. Click on the "Fwd 200" button. If the clicker is adjusted correct, the motor will spin smoothly without a racheting type sound. If it does not, loosen the screws about a 1/8th turn and repeat this step until the racheting sound goes away and the motor spins freely.
16. Color change to needle 16. Repeat step 12 and then tighten the two nuts. Repeat step 15 for the left side of the thread feeder, tightening or loosening the hex nuts as necessary.
![]()