![]()
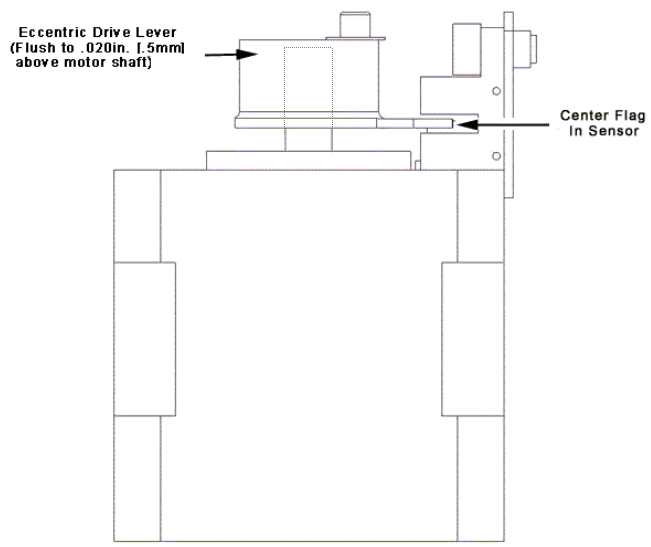
Figure 1 - Optical Sensor and Flag Adjustment
The optical sensor on the trimmer motor can and should be replaced separately when the sensors are defective, damaged, or dirty. The optical sensors on the trimmer stepper motor have a connection to the harness.
Replacement Parts Needed:
15" optical sensor assembly
1. Remove the trimmer drive assembly from the machine following the removal procedures described for the Trimmer Drive Assembly.
2. Mark the position of the optical sensor on the trimmer home bracket with a marking pen.
3. Remove the optical sensor from the trimmer home bracket and replace it with a new sensor. Make sure the sensor and the home flag on the trimmer eccentric drive lever are properly adjusted as shown in Figure 1 above.
|
|
CAUTION!! Do not over torque the screw mounting the optical sensor to the home bracket. Too much torque on the optical sensor will damage it. |
4. Tighten the screw to the minimum Melco Torque Specifications (just enough to hold the sensor in position securely).
5. Install the trimmer drive assembly into the machine following the installation procedures described for the Trimmer Drive Assembly.
![]()