![]()
The trimmer motor harness connects the trimmer stepper motor (mounted to the lower arm from underneath) to the connector socket located at J35 on the main PCB.
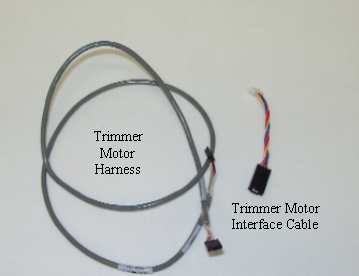
Figure 1 Trimmer Motor Harnesses
Replacement Parts Needed:
harness, trimmer motor
twist-lock cable ties (available from most hardware stores in the electrical section)
Replacement Procedures:
1. Turn the machine OFF.
|
|
CAUTION!! Use extreme care not to drop metallic objects, tools, or other conductive material on the Main PCB when you have the base cover removed. If you drop such objects on the Main PCB, it can severely damage the electronics which will be very expensive to repair. |
2. Remove the lower arm rear cover and the base cover.
3. Remove any twist-lock cable ties that bundle the trimmer motor harness to the adjacent ones.
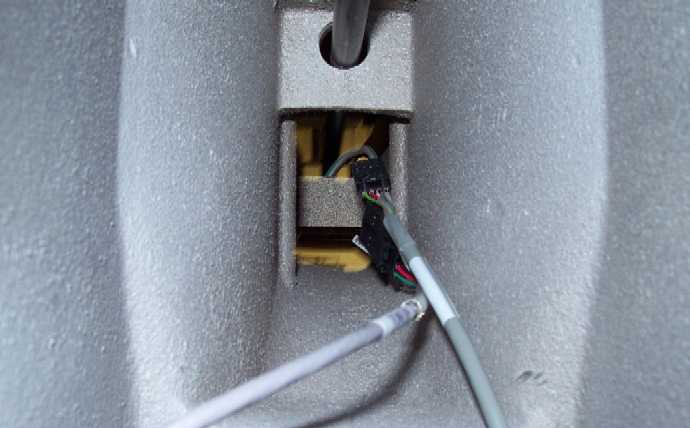
Figure 2 - Lower Arm Wiring Channel
(Visible from the backside of machine)
4. Locate the trimmer motor harness from the backside of the machine in the lower arm wiring channel. Disconnect the trimmer motor harness from the trimmer motor interface cable. The trimmer motor interface cable will be coming from the trimmer motor located about the middle of the lower arm.
5. Pull the trimmer motor harness through the right access hole from the front and disconnect it from the main PCB at location J35.
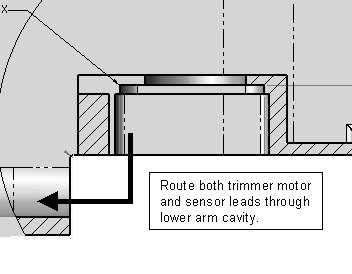
Figure 3 - Trimmer Motor and Sensor Harness Routing
6. Connect the replacement trimmer motor harness (lead marked "TRIMMER MOTOR") to the trimmer motor interface cable and run the other end to the right wiring access hole in the lower arm assembly. Route both trimmer motor and harness leads together into the lower cavity of the lower arm as shown in Figure 3 above.
7. Neatly bundle the trimmer motor harness in the back to adjacent harnesses with twist-lock cable ties.
8. Connect the trimmer motor harness lead labeled "CONTROL PCB TRIMMER - J35" to the main PCB connector socket at J35.
9. Install the covers in the reverse order that you removed them.
10. Do a short functional test to verify that the trimmer harness is good (trimmer motor is working).
![]()