Click on a menu item below to learn more.
There is a table in the machine that tells the machine where each needle is. Each needle on your AMAYA must be in the center on the hole in the needle plate. Perform the following steps to calibrate your color change table, please read through both Part 1 and Part 2 before taking any actions.
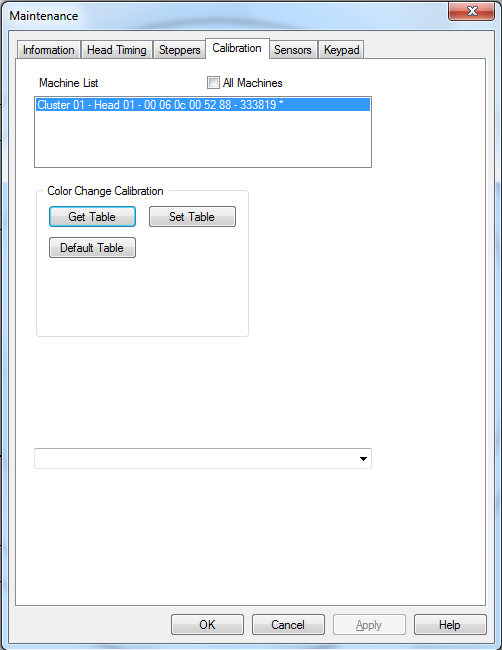
Go to the Maintenance menu.
Click on the Calibration Tab. (see above) - from here you can GET or SET the color change table.
This pulls the table out of the machine and saves it in AMAYA OS. This is especially useful if you want to keep your table and have to replace the circuit board.
This takes the table out of AMAYA OS and stores it in the machine.
This sets your table back the factory defaults.
![]() WARNING -- DO NOT RESET THE COLOR CHANGE TABLE BACK TO THIS SETTING AS IT WILL SET IT TO A DEFAULT THAT IS AN APPROXIMATION AND IS INTENDED AS A STARTING POINT FOR MANUALLY SETTING THE COLOR CHANGE TABLE. THIS IS NOT INTENDED TO PROVIDE A ONE STEP CALIBRATION TO AN ACCURATE SETTING.
WARNING -- DO NOT RESET THE COLOR CHANGE TABLE BACK TO THIS SETTING AS IT WILL SET IT TO A DEFAULT THAT IS AN APPROXIMATION AND IS INTENDED AS A STARTING POINT FOR MANUALLY SETTING THE COLOR CHANGE TABLE. THIS IS NOT INTENDED TO PROVIDE A ONE STEP CALIBRATION TO AN ACCURATE SETTING.
Go into the Head Timing Tab.
Press the Adjustment and Arrow Down keys on your AMAYA keypad. This is also Bottom Center on your Head Timing Tab.
Check to see where your needle is. It must be in the exact center of the hole on your needle plate.
If the needle is not correctly lined up, you must raise the needle up and use the Trace and Arrow Left or Arrow Right keys on your AMAYA keypad to align the needle.
Drop the needle down again to see if it is centered. Repeat the above steps until it is.
Color change to the next needle and repeat the steps for all 16 needles.
Go back into the Calibration Tab and select Get Table to save the color change calibration.