The Graphite Wide Angle Driver comes in two pieces, allowing you to leave half of the driver on your machine at all times if you wish. Both the cap frame and the micro clamp utilize the Wide Angle Driver.
- Open AMAYA OS Software and turn on the AMAYA machine.
|
- Load the cap design to sew.
|
- Select the appropriate cap frame from the hoop selection menu. See the hoop selection section for specifics.
|
- Then click on the center hoop button. The hoop will center.
|
|
- Before you install the cap frame assembly you may need to adjust your hoop arms. If the hoop arms are in the inner position, you will need to remove them. If the hoop arms are in the outer position, they can stay on the machine with the cap driver attached.
|
- On the AMAYA machine, locate the t-slot. This is a long slot under the lower arm.
NOTE: If your machine is equipped with the hook guard, it will have to be removed before installing the hoop driver. Loosen the 2 screws on either side on the hook guard to remove it. The hook guard can be reinstalled after installing the cap driver. (See second picture on the below for an example of the new hook guard.) |
| |
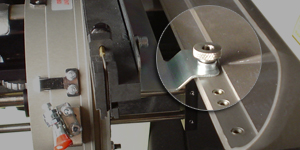
Hoop Arm without Hook Guard
|
|

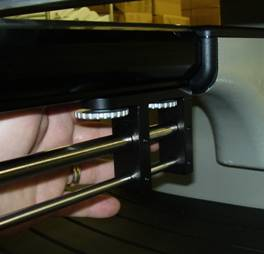
Hoop Arm with Hook Guard
|
|
|
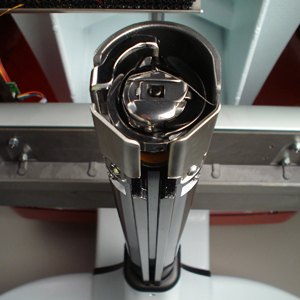
- On the cap driver, locate the t-slot above the driver shaft. Loosen the thumbscrews on both sides of the rail there is one in the front as well as the back. Loosen the thumbscrews enough to slide it on.
|
- Insert the lower arm bracket into the t-slot on the machine.
- Push the lower arm bracket until it hits a hard stop. It is very important to make sure this lower arm bracket is all the way back.
- Tighten both the front and back thumbscrews under the rail.
|
|
|
|
|
|
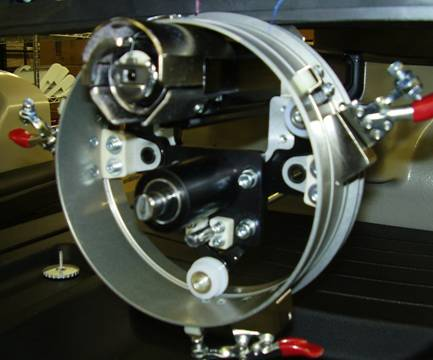
- Attach the cap frame driver ring to the lower arm bracket. This is inserted in between the needle guard grabber and the needle plate.
- Slide the cap frame driver onto the rail and push the driver as far back as possible.
|
|
|
|
- Connect the cap frame driver to the x-carriage using two of the thumbscrews from the hoop arms.
|
|