![]()
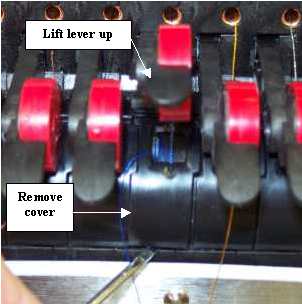
When the thread or material feed settings are too loose, birdnesting often results when thread is sucked into the thread feeder and wraps around the thread feeder roller (See the following image). This is easily cleaned out by following the below procedures.

1. First lift the lever of the thread feeder where the thread has wrapped around the roller and the two adjacent thread feeders and remove all three thread feeder front covers, carefully using your fingernails or a screwdriver.
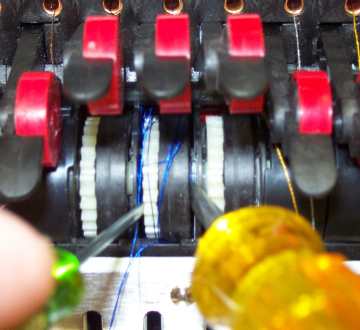
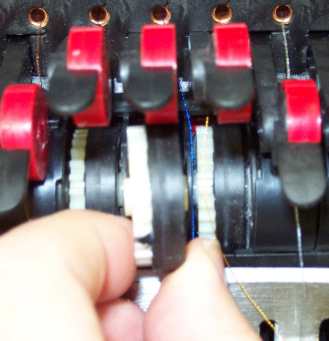
2. Using two thin bladed flat screw drivers, carefully pry the roller out of the assembly as shown in the figure below until you can pull it out easily with your finger
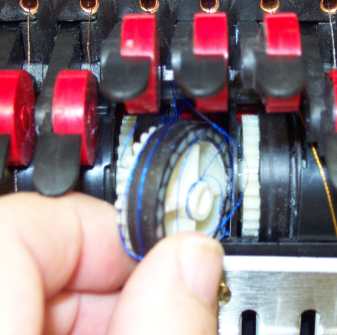
3. Once the roller is pried out enough to grab onto it with your fingers, pull it the rest of the way out and remove the thread wrapped around it.
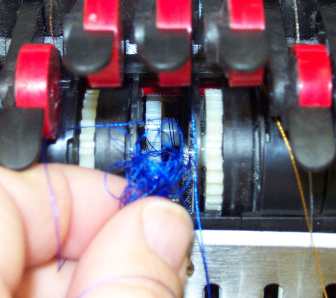
4. Remove any birdnesting or loose thread from the inside of the thread feeder assembly as shown in the figure below. Also check and remove any thread feeder wrapped around the thread feeder gear next to the stepper motor behind the needlecase.
5. Inspect the thread feeder roller rubber pad for damage, especially a groove cut into the pad where the thread runs, or any nicks or other damage (caused by pulling thread through without lifting up the red thread feeder arms). If any damage is found, replace the roller with a new one. Align the roller in place as shown in Figure 6 below, and push it all the way in until it snaps into place.
6. Insert the covers in place by moving the thread out of the way and inserting the top end of the cover into the slot at the top of the thread feeder assembly and then pushing it into the assembly until it snaps back into place as shown in the figure below. Make sure the thread is centered (critical) over the thread feeder front cover as shown below.
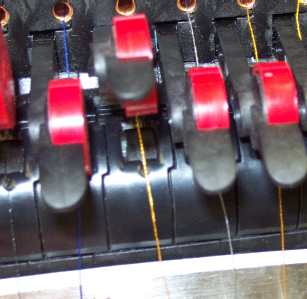
7. Rethread the machine if necessary and then make sure the thread is centered in the grooves on the thread feeder front cover as shown in the above figure and push the thread feeder arm back down.
8. In AMAYA OS, open the Settings menu, and then click on the Thread Feed tab. Check the settings for the thread and material feed and make sure they are correct. You will probably need to adjust them. See Thread Feed Tab for information on using this menu.
9. Run a test sew on any design to observe the performance of the thread feeder assembly and make additional adjustments or repairs as needed.